Setup DHCP Server in Ubuntu Server 20.04
Setup DHCP Server in Ubuntu Server 20.04
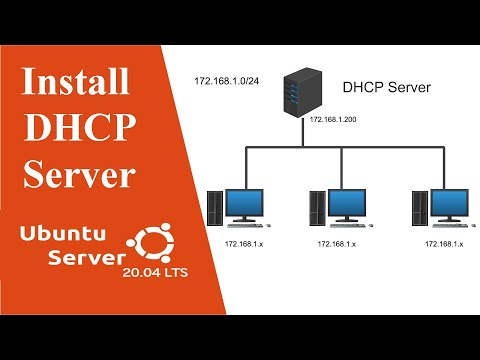
– DHCP is a service used to automatically assign network configuration to client systems. DHCP can be used as a handy tool when you have a large pool of systems that needs to be configured for network settings. Plus, when you need to change the network configuration, say to update a DNS server, all you need to do is update the DHCP server and all the connected hosts will be reconfigured with new settings. Also, you get reliable IP address configuration that minimizes configuration errors and address conflicts. You can easily add a new host to the network without spending time on network planning.
### Basic install:
1. Get root Privileges
After the reboot, you can log in with your previously created username (e.g. administrator). Because we must run all the steps from this tutorial with root privileges, we can either prepend all commands in this tutorial with the string sudo, or we become root right now by typing:
sudo -s
– You can enable the root login by running:
sudo passwd
2. Install a shell-based editor (Optional)
Here we will install two text-based editors. The Nano editor is easier to use for newbies while others prefer the traditional vi/vim editor. The default vi program has some strange behavior on Ubuntu and Debian; to fix this, we install vim-nox:
sudo apt-get install nano vim-nox
3. Configure the Network
Because the Ubuntu installer has configured our system to get its network settings via DHCP, we can change that now because a server should have a static IP address. If you want to keep the DHCP-based network configuration, then skip this chapter. In Ubuntu 20.04, the network is configured with Netplan and the configuration file is /etc/netplan/01-netcfg.yaml. The traditional network configuration file /etc/network/interfaces is not used anymore. Edit /etc/netplan/00-installer-config.yaml and adjust it to your needs (in this example setup I will use the IP address 192.168.0.100 and the DNS servers 8.8.4.4, 8.8.8.8 .
sudo vim /etc/netplan/00-installer-config.yaml
– To use a static IP address 172.168.1.200, I will change the file so that it looks like this afterward:
network:
ethernets:
enp0s3:
dhcp4:no
addresses: [172.168.1.200/24]
gateway4: 172.168.1.1
nameservers:
addresses: [8.8.8.8,8.8.4.4]
– Then restart your network to apply the changes:
sudo netplan generate
sudo netplan apply
– Then edit /etc/hosts.
sudo nano /etc/hosts
– Now, we will change the hostname of our machine as follows:
sudo echo svrdhcp /etc/hostname
sudo hostname svrdhcp
– Instll nettools
apt install net-tools
### Follow these steps to install a DHCP server:
1. Install a DHCP server:
sudo apt-get install isc-dhcp-server
2. Open the isc-dhcp-server file:
sudo vim /et/default/isc-dhcp-server
3. Change line INTERFACESv4
INTERFACESv4=”enp0s3″
4. Open the DHCP configuration file:
sudo vim /etc/dhcp/dhcpd.conf
5. Change the default and max lease time if necessary:
default-lease-time 600;
max-lease-time 7200;
6. Add the following lines at the end of the file (replace the IP address to match your network):
subnet 172.168.1.0 netmask 255.255.255.0 {
range 172.168.1.80 172.168.1.90;
option routers 172.168.1.1;
option domain-name-servers 8.8.8.8, 8.8.4.4;
option domain-name “abc.local”;
}
This will result in IP addresses ranging from 192.168.1.80 to 192.168.1.90 to be assigned to clients. The default lease time is set to 600 seconds with maximum bound of 7200 seconds. A client can ask for a specific time to a maximum lease period of 7200 seconds. Additionally, the DHCP server will provide a default gateway (routers) as well as default DNS servers.
7. You can reserve an IP address to be assigned to a specific device on network. Reservation ensures that a specified device is always assigned to the same IP address. To create a reservation, add the following lines to dhcpd.conf. It will assign IP 192.168.1.88 to the client with the 08:00:07:26:c0:a5 MAC ID:
host VM1 {
hardware ethernet 08:00:07:26:c0:a5;
fixed-address 172.168.1.88;
}
8. Save the configuration file and exit with Ctrl + O and Ctrl + X.
9. After changing the configuration file, restart dhcpd
sudo systemctl restart isc-dhcp-server
10. Check status
sudo systemctl status isc-dhcp-server
11.
sudo netstat -anp | grep dhcp
12.
sudo ufw allow 67/udp
13.
sudo ufw status
14.
dhcp-lease-list
⭐ Connecting With Us ⭐
——————————————-
Email for any enquiry: [email protected]
YouTube Channel: https://www.youtube.com/ErrorAndFix
Join our FB Group: https://www.facebook.com/groups/errorandfix
Like our FB Page: https://www.facebook.com/errorandfix
Website: https://errorandfix.com
TikTok: https://www.tiktok.com/@hungdo9049
⭐ Topics ⭐
Remote Desktop Connection: https://youtube.com/playlist?list=PLZ9CDyoGbVhXLrCZDecCxnGmqXH_rADkR .
Comments are closed.