DB2 GPS Tracker Installation Guide – 2 Minutes
DB2 Self-Install GPS Tracker from Rewire Security.
https://www.rewiresecurity.co.uk/db2-self-install-diy-gps-tracker
DB2 Is a compact GPS Tracker ideal for tracking motorcycles and cars in real-time. It has integrated powerful antennae thus it can be placed under the hood and it will still work accurately.
DB2 is one of the most advanced tracking devices and it can be installed by an inexperienced individual as shown in this video.
Before you start make sure the vehicle’s engine is switched off and the keys have been removed from the ignition.
Step 1
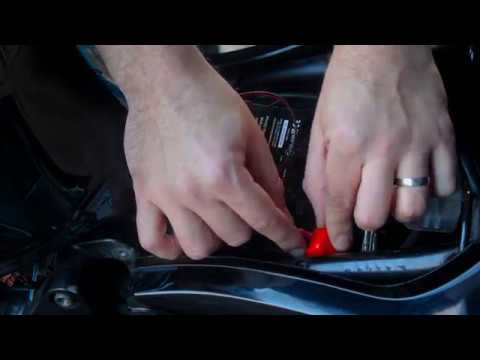
Remove the DB2 tracker from its box and locate the trackers two power cables. Red is Live (+) and Black is Negative Ground (-).
Step 2
Locate your vehicle’s battery. Depending on your vehicle this may be under the bonnet, in the boot or under a seat. If unsure please consult your vehicles owners manual.
Step 3
Locate the battery terminals on the top of the vehicle’s battery. The polarity will be indicated by either a Red/+ for positive and Black/- for ground.
Step 4
Loosen the battery terminals without removing the terminal, one at a time. Take care not to short them together.
Step 5
Connect the tracker’s spade connectors to the vehicles loosened battery terminals. Connect the trackers red/+ cable first and then the trackers black/- cable. Then re-tighten the tracker’s vehicles battery terminals.
Step 6
Check the LED indicators on the trackers have switched.
Step 7
Choose & clean a flat surface where the tracker will be located. Remove the protective film from the adhesive pad on the rear of the tracker. Place the tracker on the surface ensuring it is securely secured.
Now the installation is complete.
You can track your car via: https://gpslive.co.uk
Comments are closed.