Connect Domain with Hosting & Upload Website to Live Server using Cpanel in Hindi
Welcome, Host Website Live. How to Upload Website to Live Server using Cpanel in Hindi. Before you can upload your website, you’ll need to know your username, password, and website address for your hosting service’s FTP server.
😍😍 Free Portfolio Website Code Click here : https://www.blogger.com/blog/post/edit/4362012377884254076/8941994623141453765
**************** BEST OFFER ON SERVER ***************
Guy’s If you are thinking of buying a server(Web Hosting) then this is the best time because I have special offer for you ❤
If you buy through the Link given below, then you will get 😍
Minimum 50% to 70% Discount(Depends on Plan) + 7% Extra Special Coupon Code 👇.
❤❤ ** Click Here For Server Link : http://www.hostinger.com/thapa7 **❤❤
❤ For Thapa Family Use Special Discount Coupon : THAPA7 ❤❤
When you buy through my Link then Join Our Telegram Group to get 200rs Cashback👉 https://t.me/thapatechnicalserver
For More check Website Link: https://www.thapatechnical.com/2021/10/how-to-buy-india-best-web-hosting-get.html
**************** BEST OFFER ON SERVER 👆***************
Upload using cPanel File Manager:
Upload Website using Cpanel In Hindi
cPanel is the most popular panel for managing your hosting account. And you can easily download, manage and upload your website’s files on the server via cPanel File Manager.
Using this option you can upload your website’s files on your hosting account using cPanel’s inbuilt File Manager. You need to follow the below-mentioned steps to upload the content using the cPanel:
1) Login to your cPanel.
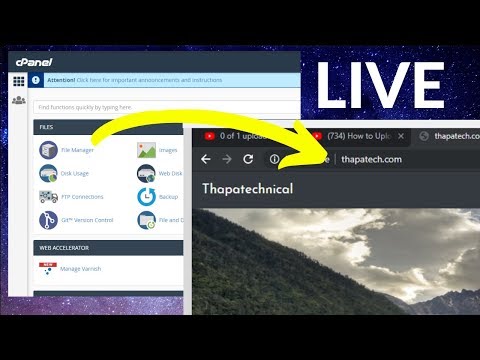
2) In your cPanel, scroll down to the Files section and click on the File Manager icon.
File Manager in Cpanel
3) Now you need to select your directory as Web Root (public_html/www) & choose your domain name from drop down arrow in case you have multiple domains under a hosting plan.
And then check on Show Hidden Files (dotfiles). Now click on Go button as shown in the below screenshot.
File Manager directory in Cpanel
4) Now you are inside your File Manager in your Cpanel. Click on Public_html folder shown at the left side on your screen under the folder directory. This will show all the list of files in your public_html folder.
Note: All files must be upload in public_html folder for you to see when you type the URL of your website i.e. www.yourdomain.com.
5) Click on Upload in your navigation bar on the top of the page.
Upload website in cpanel using File Manager
5) Click on Browse button and select the website’s files from your PC/mobile which you want to upload.
Browse to your files in your PC
6) After selecting your files that you want to upload, click on Open button and wait for the uploading process to get completed.
Uploading process in Cpanel
7) Once the uploading process is complete you need to click Go Back button. It will take you back to public_html folder in your cPanel.
Back to the public html folder
Congratulations! Now your website has been uploaded. You can check your website by opening it in your browser.
Comments are closed.