How to Set Wifi Address to DHCP/Static on Samsung Galaxy A53
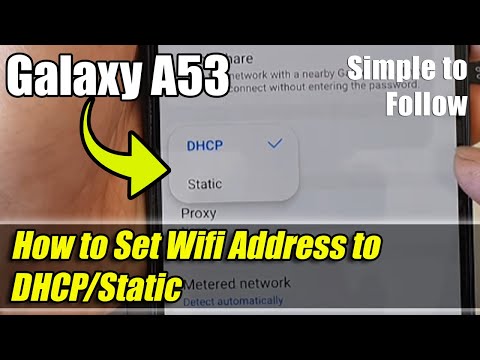
Welcome to our comprehensive guide on how to set your WiFi address to either DHCP or Static mode on the Samsung Galaxy A53! If you’re tired of grappling with network connection issues or wish to optimize your device’s connectivity, you’ve come to the right place. In this tutorial, we’ll take you through the step-by-step process of configuring your WiFi settings, enabling you to choose between dynamic IP assignment (DHCP) and static IP assignment.
Benefits:
Discover the numerous advantages of adjusting your WiFi address settings:
1. Seamless Connectivity: By switching to DHCP mode, your Galaxy A53 will automatically obtain an IP address from your network, ensuring effortless and rapid connection to available WiFi networks.
2. Optimized Performance: Opting for a static IP address can enhance your device’s performance by maintaining a consistent connection, reducing latency, and potentially improving online gaming, streaming, and other data-intensive activities.
3. Network Management: Learn how to allocate specific IP addresses to your device using static mode, facilitating easier network management and potentially improving security measures.
4. Troubleshooting Made Easy: If you encounter network issues, understanding how to switch between DHCP and static modes can be an invaluable troubleshooting tool, helping you resolve connection problems quickly.
5. Customization: Explore the freedom to set a manual IP address, gateway, and DNS servers in static mode, granting you more control over your device’s network configuration.
To Donate to DIY Fix so I can keep making relevant videos on newer electronics, use https://gofund.me/99fb9668.
#The above may contain affiliate links.
#Commissions Earned
As an Amazon Associate, I earn from qualifying purchases .